How to Make a Raised Garden Bed


If you’ve been thinking about starting a garden but don’t have the space or suitable soil in your yard, raised garden beds can be a great solution. Not only do they provide better drainage and control over soil quality, but they also make gardening more accessible for those with limited mobility.
Table of Contents
ToggleBuilding your own raised garden beds can seem daunting, but with a little planning and effort, it’s a satisfying and rewarding project that can yield bountiful harvests for years to come. In this post, we’ll guide you through the steps to build your own raised garden beds and help you get started on your gardening journey.
Raised garden beds offer numerous benefits for gardeners of all levels.
Firstly, they provide better soil drainage, which prevents waterlogging and allows for more oxygen to reach the plant roots.
Additionally, raised beds can help keep weeds and pests at bay, as they create a physical barrier between the soil and the surrounding environment.
They also make gardening more accessible by reducing the need for bending or kneeling, making it easier for people with mobility issues to enjoy the benefits of gardening.
Lastly, raised beds may extend the growing season by warming up the soil earlier in the year, which can help plants thrive and produce more abundant harvests.
Overall, a raised garden bed is a fantastic investment for any gardener looking to improve their growing conditions and maximize their yields.
When choosing a location for your raised garden bed, there are a few things to keep in mind.
When it comes to choosing a location for your raised garden bed, one of the most important things to consider is the amount of sunlight your plants will receive.
Most vegetables require full sun for optimal growth, so it’s important to choose a location that gets at least 8 hours of direct sunlight per day. Keep in mind that certain plants may require more or less sunlight, so do your research before selecting your location.
Proper drainage is essential for the health of your raised garden bed.
You want to choose a location that has good drainage to prevent waterlogging and the risk of root rot. Avoid areas where water tends to pool or where the soil stays consistently damp.
A gentle slope can be beneficial as it encourages water to drain away from the bed.
If you have a flat area, consider adding a layer of gravel or sand at the bottom of the bed to aid in drainage. By ensuring your raised garden bed has proper drainage, you’ll be giving your plants the best chance to thrive.
When choosing a location for your raised garden bed, consider a spot that is fairly flat to reduce the amount of digging required.
My yard is flat so I had to do some digging to level out my garden bed.
Additionally, make sure the location is easily accessible so that you can tend to your plants without any difficulty. This will also ensure that you can easily water and fertilize your plants as needed.
By choosing a location that is both flat and accessible, you can make the process of building and maintaining your raised garden bed a lot easier and more enjoyable.
When building a raised garden bed, you’ll want to consider whether to use treated or untreated lumber.
Treated lumber is chemically treated to resist insects and rot, making it more durable and long-lasting.
However, if you plan to use the garden bed for growing vegetables, it’s recommended to use untreated lumber as the chemicals in treated lumber can potentially leach into the soil and into the vegetables you eat.
While untreated lumber may not last as long, it’s a safer choice for growing edible plants. On the other hand, if you’re building a flower bed, treated lumber may be suitable as you won’t be consuming anything from it.
Ultimately, the choice between treated and untreated lumber depends on your specific needs and priorities.
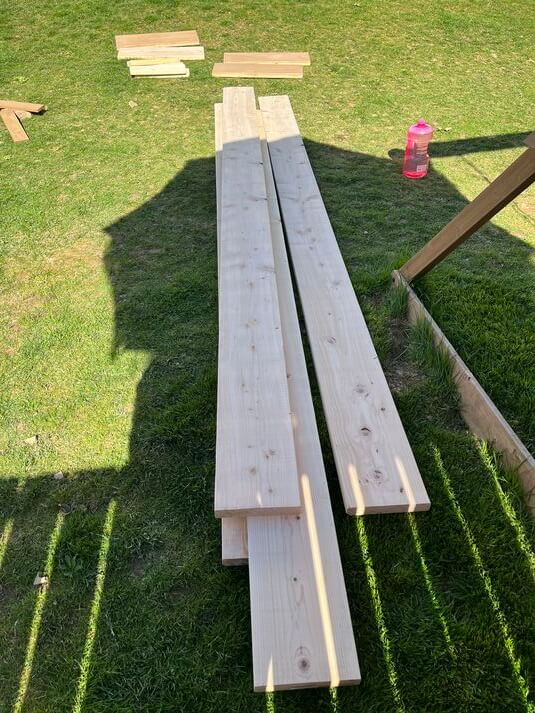
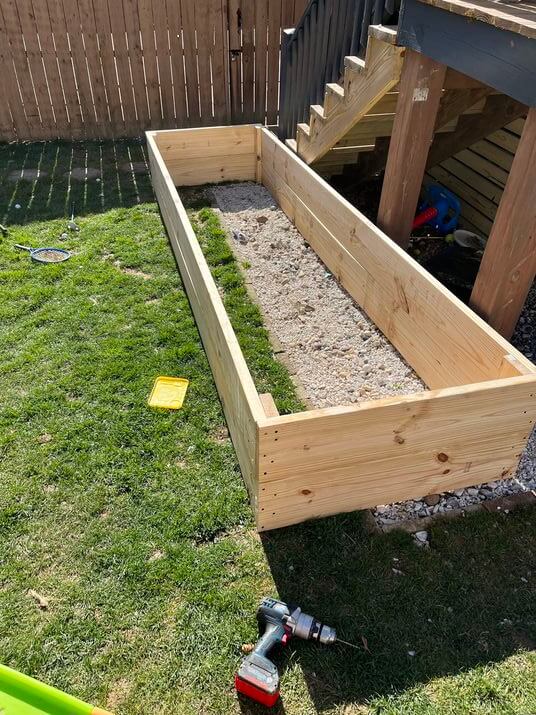
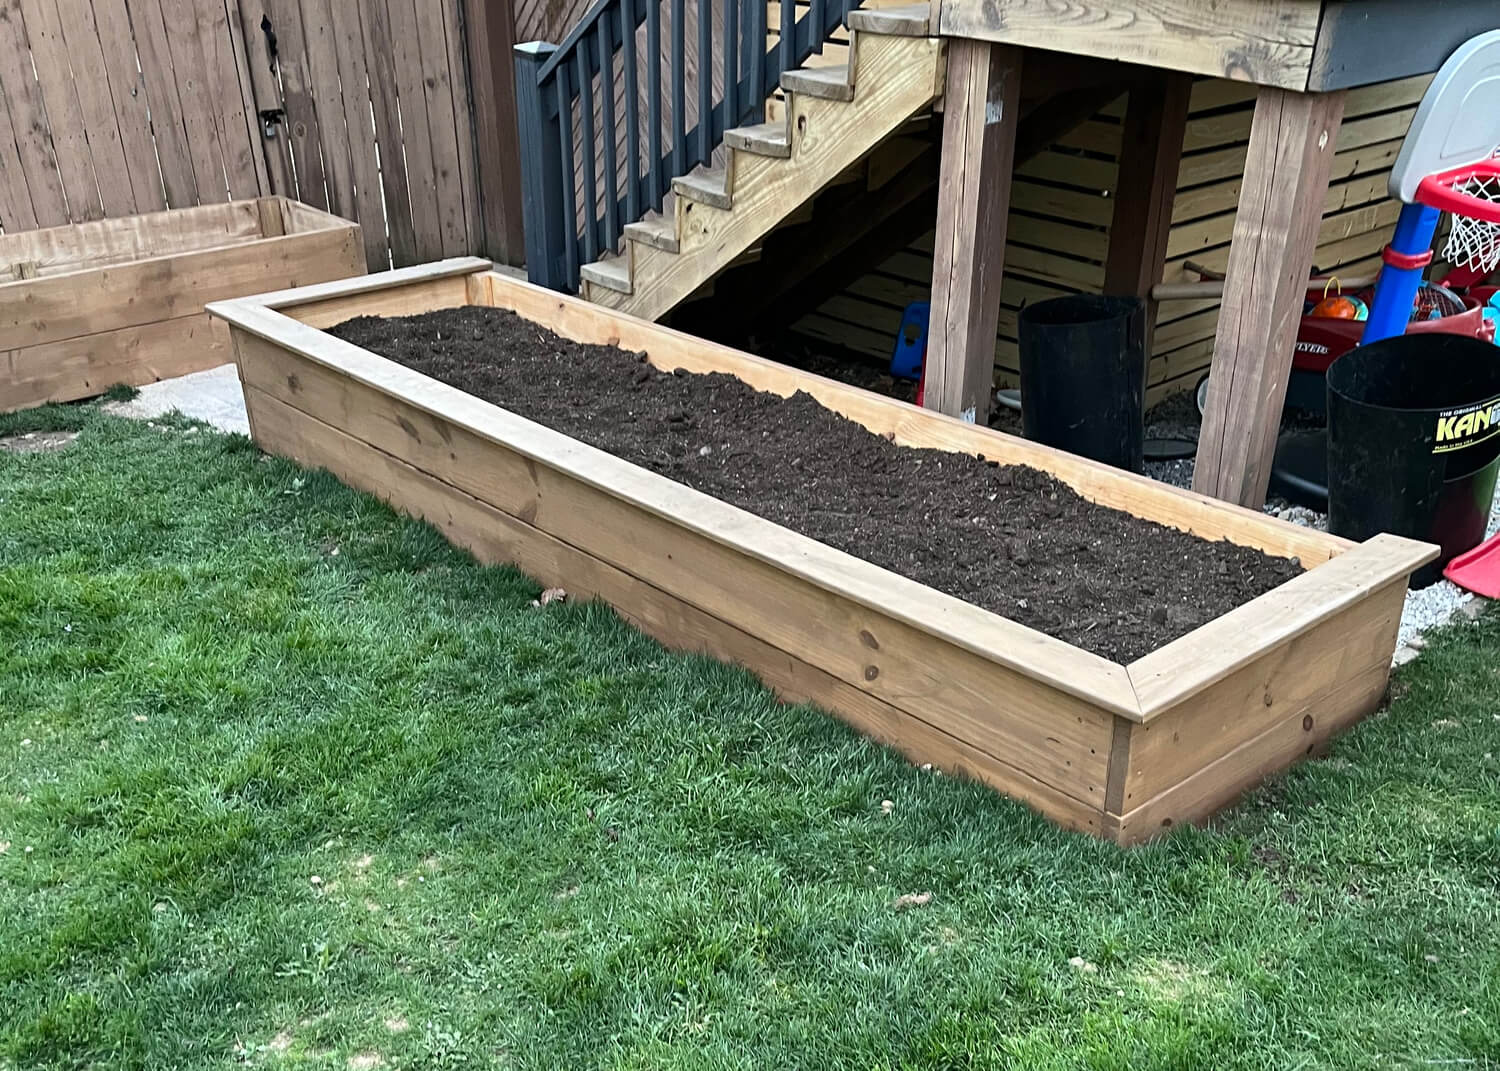
Let’s take a look at the materials you will need to build a garden bed like mine. My garden beds were approximately 12′ long by 2-4′ wide and 19″ high. My wife and I will be using these beds for growing vegetables so we went with untreated lumber.
I wanted my raised garden bed to be approximately 20″ off the ground so I went with untreated 2x10s. You can base the width of your boards on your preference for height.
Let’s take a look at the steps to get your raised garden built and ready for the growing season!
Deciding on the size and layout of your garden bed is going to depend on two things. The size of the area you have, as well as what you are going to be planting.
Before you decide on a size of your garden bed make sure to look into the suggested distances between plants. Some plants require a lot more space than others, so it is good to have that information handy when planning the dimensions of your box.
Also if you have a small yard there is only so much room you will have to fit your boxes. Keep in mind that if your boxes are over 3 feet you will want to leave room on all 4 sides of your box. You don’t want to be climbing into your box to pick weeds!
To cut your boards to length you can either use a miter saw or a circular saw. When cutting longer boards you will need the help of a friend, and don’t forget safety glasses and hearing protection.
A miter saw provides a more precise and square cut, but the cost can be prohibitive if you don’t do much wood working. You can also have your local Lowes or Home Depot cut the wood for you in store.
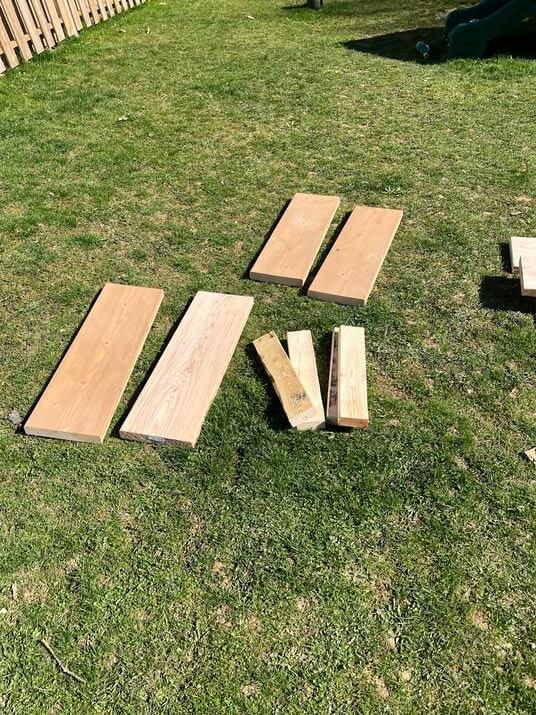
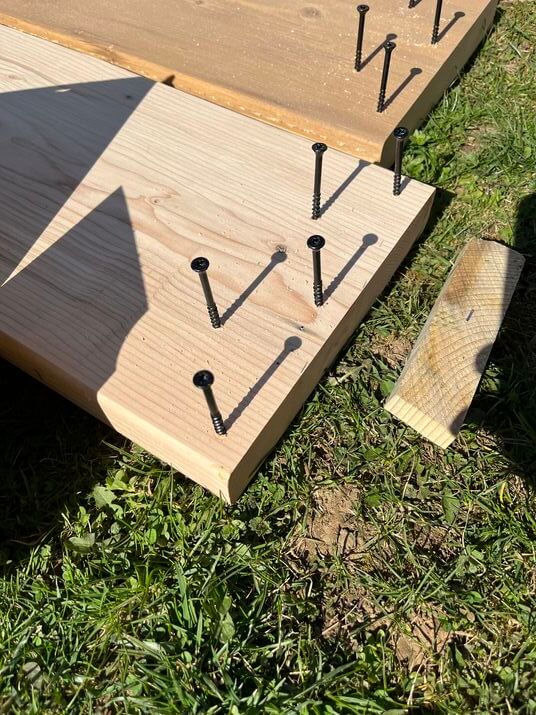
Now that you have the layout of your garden bed, cutting the lumber is pretty straight forward. Just remember to subtract 3 inches from either the length or width depending on how you are going to screw your boards together.
As you can see from the picture below one end will be butted up against the other edge adding 1 1/2″ to each side. This shouldn’t make a ton of difference unless you need exact sizing for your garden bed.
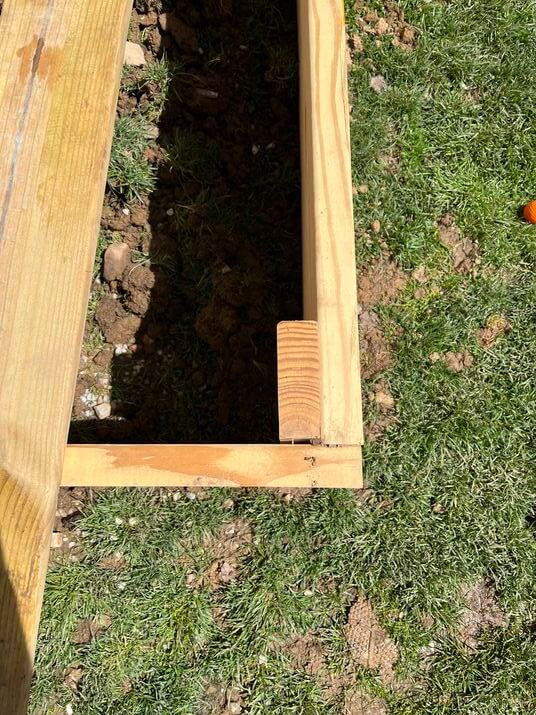
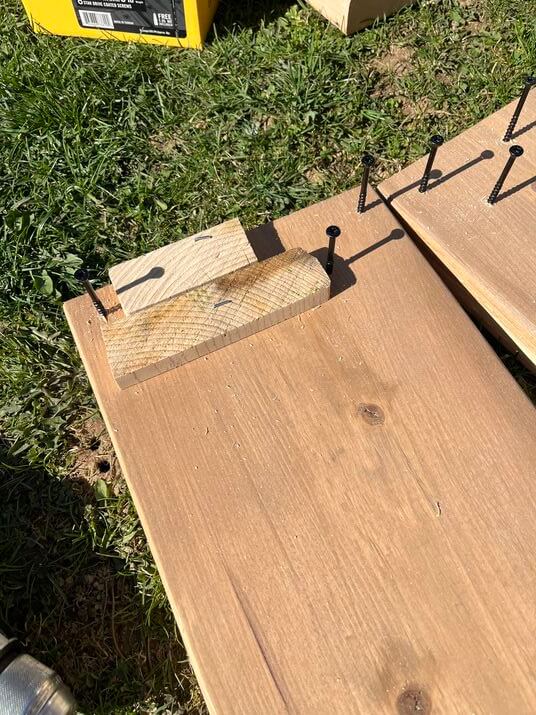
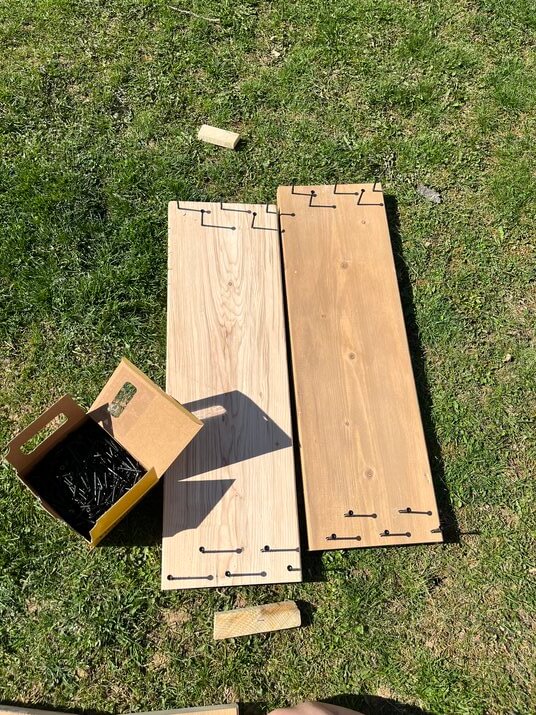
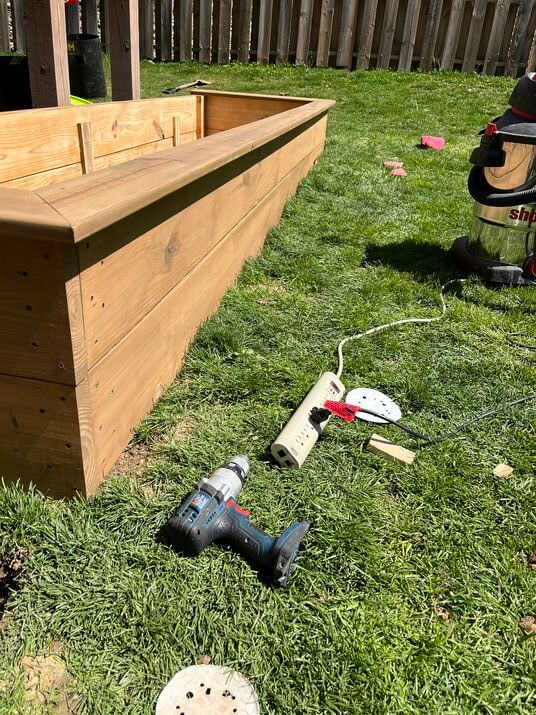
To attach the sides to each other I used a 2×4 cut to the height of the garden bed to provide additional support.
Predrill each hole to keep the wood from splitting. I used cut off pieces as a gauge to make sure the screws would be going into the center of the pieces on the other side of the wood. (See pictures above)
Make sure to evenly space the screws out so that it provides support across the entire board, as well as looks nicer when finished.
It is also important to make sure the top and bottom our even. If you are able to build your garden beds on a flat surface it will make it much easier.
Connect all 4 sides together the same way you connected them to the support piece. Once again having a friend to help, as well as a flat surface to build on is going to make this much easier.
To check square measure diagonally from corner to corner both ways. If the numbers are the same then your box is square. This doesn’t have to be perfect but should be pretty close.
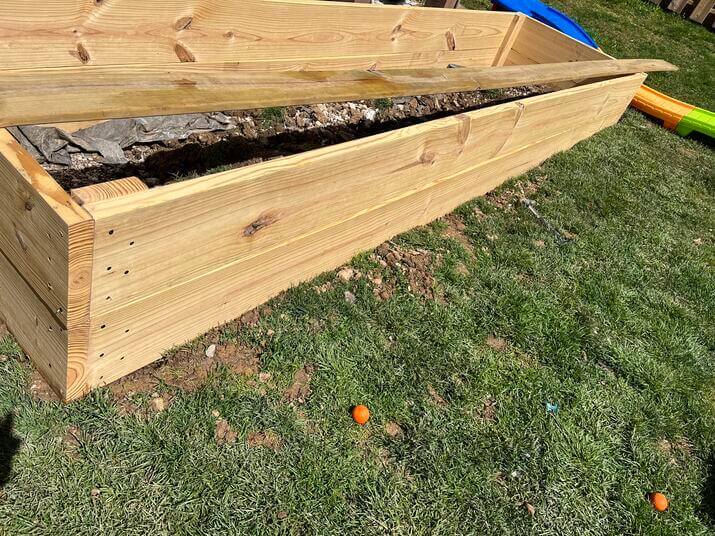
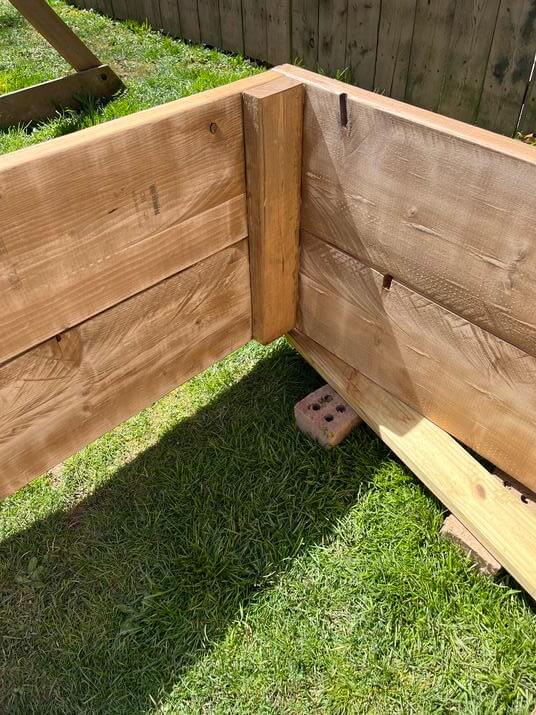
As you can tell from my pictures my yard is far from flat. To create a “flattish” garden bed I needed to dig out around the box.
There is no easy way to do this, it is by far the worst part of building your own garden bed.
I placed the garden bed where I wanted it, and edged around the box with a garden edger. Then after removing the box, I dug a “ditch” of increasing depth as I went up the hill. Use a level as you go and get it as close as you can to level.
After about an hour of digging in the rain, I had enough and called it close enough!
Laying down weed barrier fabric on the bottom of your raised garden bed is a smart decision that can provide a number of benefits. Not only does it help prevent weeds from growing in your garden, but it can also improve drainage and keep your soil from mixing with any underlying materials.
Additionally, weed barrier fabric can help reduce soil compaction, which can benefit root growth and overall plant health.
When selecting a weed barrier fabric, look for one that is made from high-quality materials that are designed to last. Proper installation is also important, so be sure to read the instructions carefully before laying down the fabric.
When it comes to staining your raised garden bed, there are a few things to consider.
While some people prefer the natural look of wood, others opt to stain the outside of their box for a couple of reasons. Personally, I chose to stain the exterior of my garden bed for aesthetic appeal and to provide an extra layer of protection against the elements.
However, it’s important to note that the type of stain you use matters. I originally stained the inside of my box with a Low VOC stain, but after doing some research, I decided to sand it down because there is some debate if it is a good option for a vegetable garden.
Another option is to line the inside of your garden box with plastic to protect the wood from the constant moisture of the dirt.
Ultimately, the decision to stain your raised garden bed depends on personal preference and the types of plants you plan to grow. If you’re looking to plant flowers, then the choice is entirely up to you.
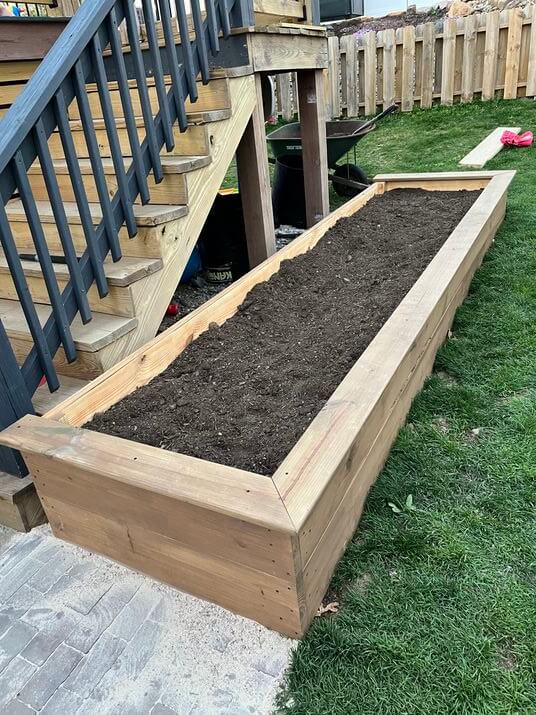
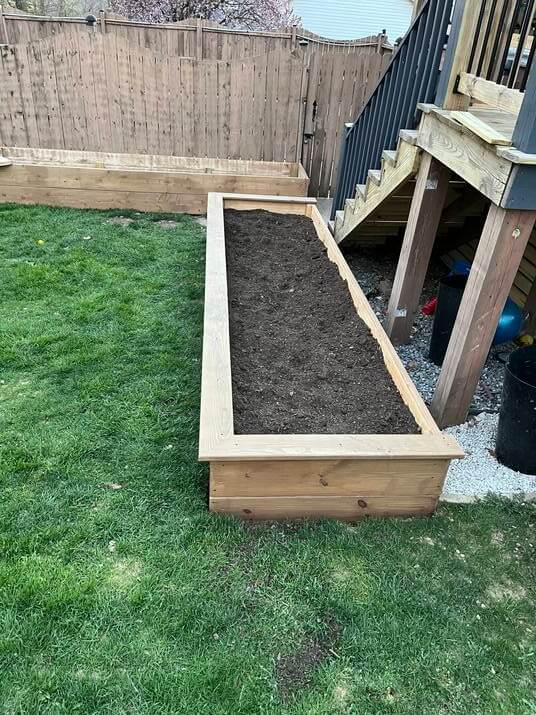
Filling your raised garden bed with dirt can be an exciting step in creating your own garden space. While there is no one right way to do it, it’s important to make sure you’re using quality soil that is appropriate for your plants.
As an amateur gardener, I don’t have personal opinions on soil, but I can tell you that it’s always a good idea to seek advice from experts in the field.
One way to do this is by visiting a local soil and mulch dealer and asking for their opinion on the best soil to use for your garden. I followed this advice and it worked out well for me.
As a side note, it’s often cheaper to purchase soil by the scoop rather than in bags, so if you have access to a truck or trailer, it’s worth considering.
By using quality soil and seeking advice from professionals, you can help ensure the success of your raised garden bed.
Adding a decorative seating area around the edge of your raised garden bed is a great way to enhance both the functionality and the appearance of your garden.
By cutting deck boards at a 45-degree angle and screwing them into the edge of the box, you can create a stylish and functional border that also provides a comfortable seating area for you and your guests.
It’s important to predrill the boards carefully before screwing them in, to avoid splitting the wood. Using a high-quality, weather-resistant deck board is also recommended to ensure that your seating area remains in good condition for years to come.
With a little bit of planning and some basic DIY skills, you can create a beautiful and functional garden space that you’ll love spending time in.
Building a raised garden bed can be a rewarding and enjoyable project that allows you to grow your own vegetables, flowers, and herbs in a small space. B
y following the tips and advice outlined in this blog post, you can create a sturdy and functional garden box that is well-suited to your needs and preferences.
From choosing the right materials and soil to filling your bed and adding decorative touches, there are many ways to customize your garden box and make it your own.
I hope that you found this information helpful, and if you have any questions or comments about building a raised garden bed, please feel free to post them below. I’d love to hear from you and help in any way I can!

Are you looking to expand your styling skills and turn them into a small business of your own? Starting a barber shop business can be an exciting (and lucrative) move, but it’s important to understand the costs associated with setting up your dream. That is exactly what we’ll explore in this blog post – how…

Are you dreaming of a far-off getaway, but don’t have the time or money to make it happen? Consider trading in your overseas retreat for a staycation instead! By planning a creative and exciting trip right in the backyard, you can enjoy all sorts of activities without breaking the bank. From exploring local attractions to…

In today’s financial landscape, credit scores hold significant sway over our financial lives. They impact our ability to secure loans, rent apartments, and even affect insurance premiums. Among the various factors that contribute to credit scores, credit utilization plays a crucial role. In this blog post, we will delve into the concept of credit utilization,…

Car accidents can be overwhelming and emotionally draining, especially when it comes to dealing with insurance claims. Many individuals find themselves unsure about their rights and the compensation they deserve. In such situations, hiring a skilled car insurance claims lawyer can make a significant difference in securing fair compensation and navigating the complexities of insurance…

Are you looking for a flexible job that pays cash under the table and doesn’t require a formal education or certification? If so, you’re in luck! There are many jobs available that pay under the table, ranging from side hustles to full-time positions. While receiving cash payments can have its advantages, it’s important to be…

Are you ready to take control of your personal finances? Making a budget and sticking to it is one of the most effective ways to make sure you’re keeping track of where your money is going, but it isn’t always easy for those who get paid biweekly. That doesn’t mean you can’t be financially successful…